![]()
Blended Scanning
This tutorial will help you get the most from difficult to scan slides. It is similar to blending two different slides. The difference is that you scan one slide twice. This in theory improves the dynamic range of your scanner.
On a July 2001 trip to Colorado, while visiting the famous Maroon Bells, I made a number of sunrise visits during the four days that I was there. I came home with many great images. Most were shot with Lee ND grads to lower the tonal range so the film could handle it better.
After receiving my slides back, they were all laid out on the light table. Plenty of great exposures and quite a number of them to scan. Most images had no trouble scanning but a few could've been better if my scanner had a higher dynamic range.
I then came up with the idea of scanning once overall. Then making another scan to improve the shadow areas. Then combining them in Photoshop.
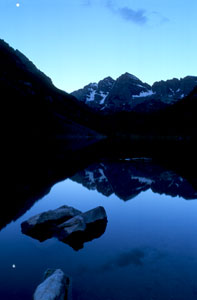
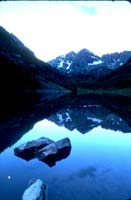
Above was the first scan which emphasizes the sky and reflection. It's a good scan but the shadows could be better.
![]()
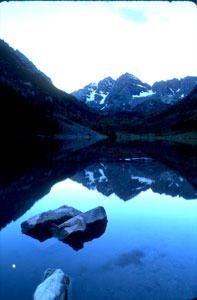
I then scanned the same slide again. This time emphasizing the shadow areas, which blows out the highlights.
Then I selected the entire image by going to Select/All or hitting the keys Ctrl A.
I then copied the image by going to Edit/Copy or hitting the keys Ctrl C.
Next I reopened the sky and reflection scan. Then pasted the shadow scan using Edit/Paste or hitting Ctrl V.
Now both images are on the same canvas.
![]()
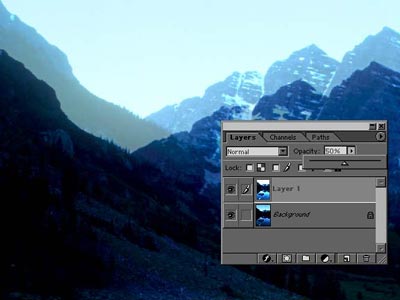
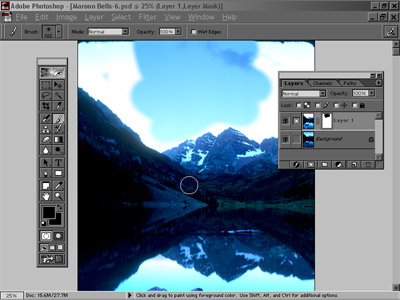
Now both images need to be properly lined up.
This is done easily by setting the Opacity of the top layer to about 50%.
Now you can precisely line them up with the Move Tool. Once you get them close you can use the Arrow Keys to move the layer pixel by pixel.
*You shouldn't need to rotate either layer unless you moved the slide between scans.*
Now return Opacity to 100%.
![]()
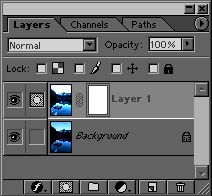
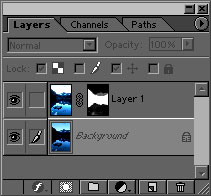
On that new layer (Layer 1) with the shadow scan you create a Layer Mask. You do this by clicking on the button with the gray square with the circle.
Or by clicking Layer/Add Layer Mask.
![]()
Making sure that the layer mask is highlighted. Start coloring with black over the areas of the second scan you want to remove (in this case the bright white areas). This will reveal the pleasing and proper sky below (from the original scan).
Near any critical edges you will need to use a smaller brush size.
You can also color with varying degrees of gray to vary the intensity of the second scan.
![]()
This is what the layer mask could look like when through.
If you look close, there are areas where I colored the layer mask with gray.
I used gray to lighten the mountains and foreground rocks slightly from the original scan.
![]()
 -highlight
scan
-highlight
scan
 -shadow
scan
-shadow
scan
 -Combined
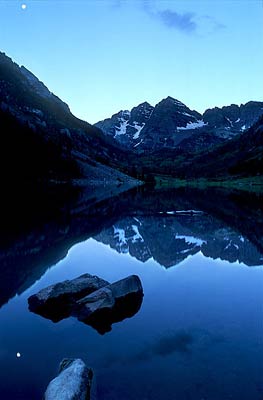
Taken with an EOS-1V HS, TS-E 24 3.5L on Fuji Provia F.
This image is closer to what I saw and also what is really on my slide. It is much more pleasing that the first original scan.
![]()